Home Made Pizza
So for my first content post of the year, I'm going to start with what I plan is a series of posts showing various cooking exploits. It kind of intersects a couple of my interests: I love food, and I love to take pictures -- so why not do both? Back when I lived with my roommate Mike a few years ago, we both liked to cook a little bit, although he was a bit more ambitious in the projects he came up with. Something he introduced me to though was the something awful recipe collection: Goons with Spoons. That's not where I got this recipe, but it is the style that I'm going to mimic. In each recipe, photos are taken along the way to illustrate how the food is prepared. Maybe it isn't all that necessary for those experienced in the kitchen, but it is encouraging to know you're still on track.
So, here is today's recipe, like you can see in the title: home made pizza. This recipe comes from the Good Eats television show, and is published on the web here. My version only differs from his by taking the amount of salt down since I found the original recipe a bit too salty for my taste. This recipe has been a standby of ours for the last few months. Since the first time we made this at home, I don't order pizza home, and I don't often have pizza in restaurants either anymore. This is simply that good. The other thing is it really isn't all that hard. With a little foresight, you just make the dough earlier in the day and let it rise over the afternoon. Then when dinner time rolls around, roll out your dough and pop it in the oven.
So, with all that said, let's begin. Here's what you need:

2 tbsp sugar
1 tsp salt
1 tbsp olive oil
1 tsp instant yeast
2 cups strong/bread flour
3/4 cups warm water
The only "special" ingredient here is the bread flour. You can use all purpose flour too, but your crust won't be as chewy.
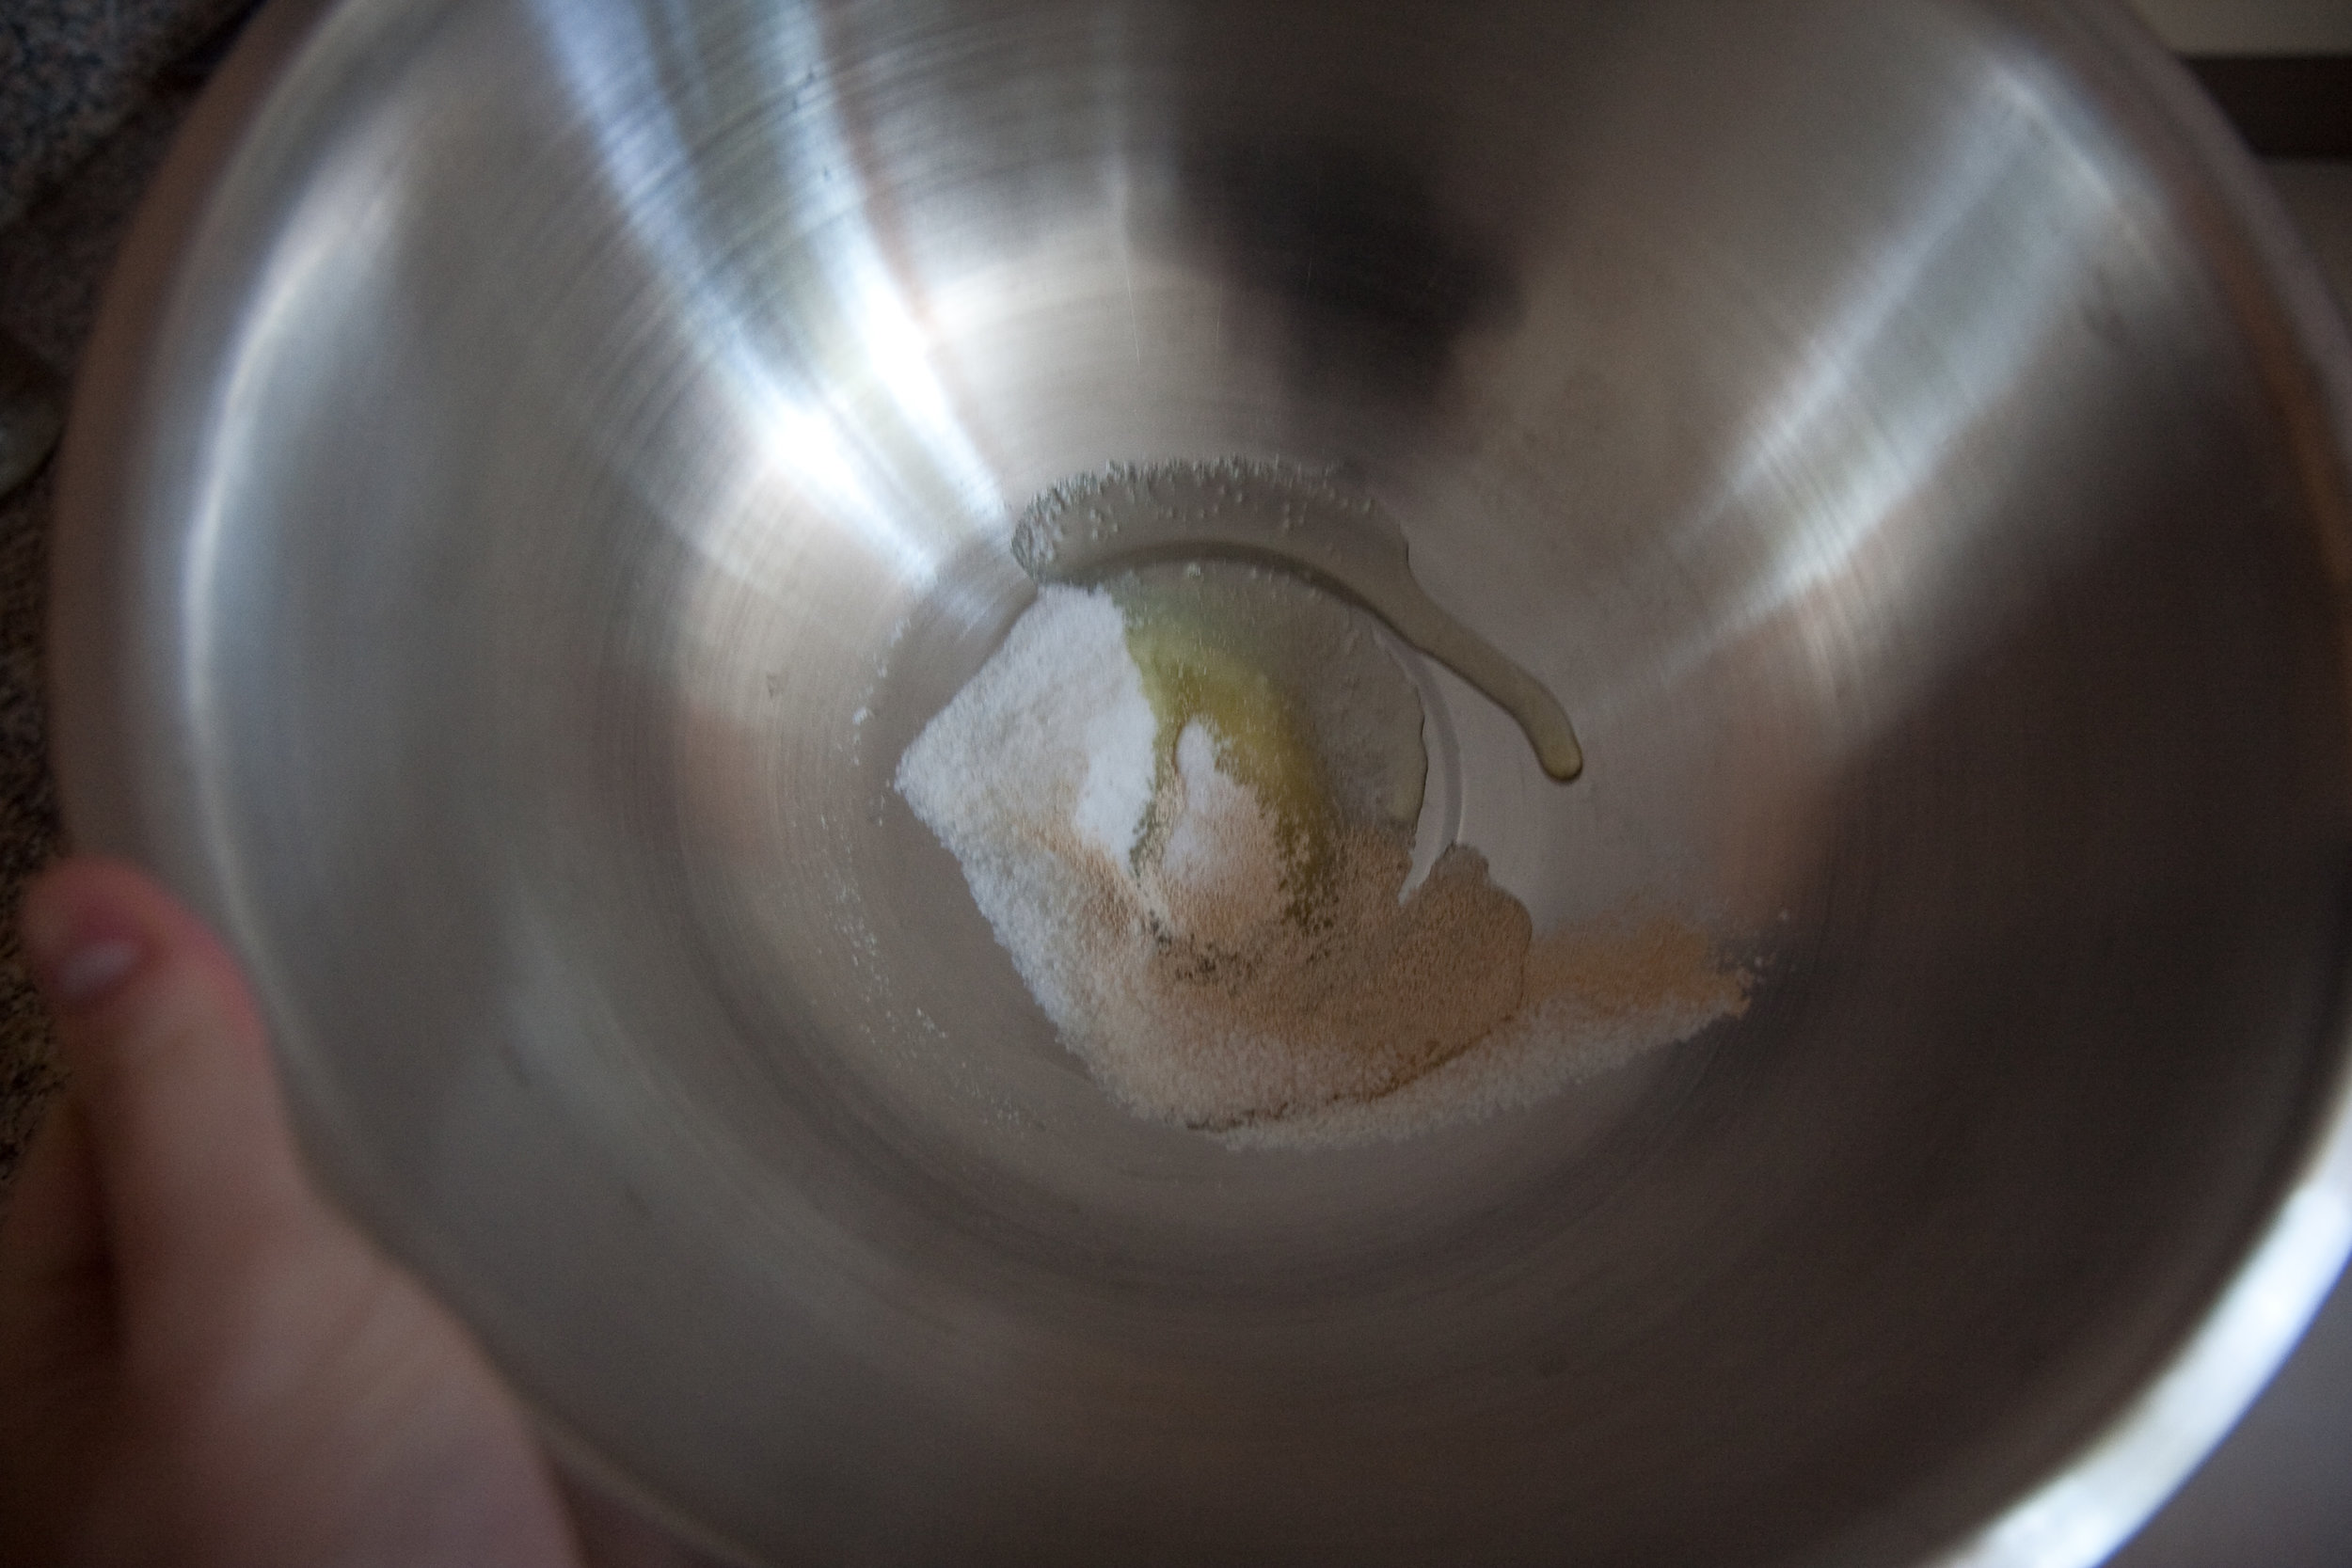
The process isn't terribly complex. Just add the ingredients in roughly the above order, and you'll be fine. Note that unlike normal yeast, you don't have to bloom instant yeast in warm water before mixing it in. It works just fine this way. So after some mixing you'll start to get a ball of dough. Make sure your water is warm though -- if it is too cold the yeast won't be too happy and your dough won't rise much.

Alright, the only trick is extra flour. You'll probably find that your mixture is pretty sticky after mixing it all together. You're going to need to add more flour and exactly how much takes a bit of practice. It's not game breaking, so don't sweat it. What you're looking for is to add enough flour that the dough no longer sticks to your hands and is easy to knead. Make sure to give the dough some kneading - it is this process that makes the starch bonds stronger and will make your dough nicer at the end. I find though that as long as I take my time and add flour slowly as the dough accepts it, that it turns out pretty good. When you're done, make it into a ball kind of like this:

Now cover with a towel and let sit. You're done! Go relax for awhile. For this particular day, I went and played Shadow Complex on the xbox for awhile. A great game, by the way! The good eats recipe has you refrigerate the dough overnight, but I haven't found that to be necessary. Just let it rise for a few hours over the afternoon and by dinner time you'll have dough you can work with.

Now preheat your oven to 500°F/260°C (you want your oven HOT for pizza). If you have a pizza stone, it should be in your oven while it heats up.
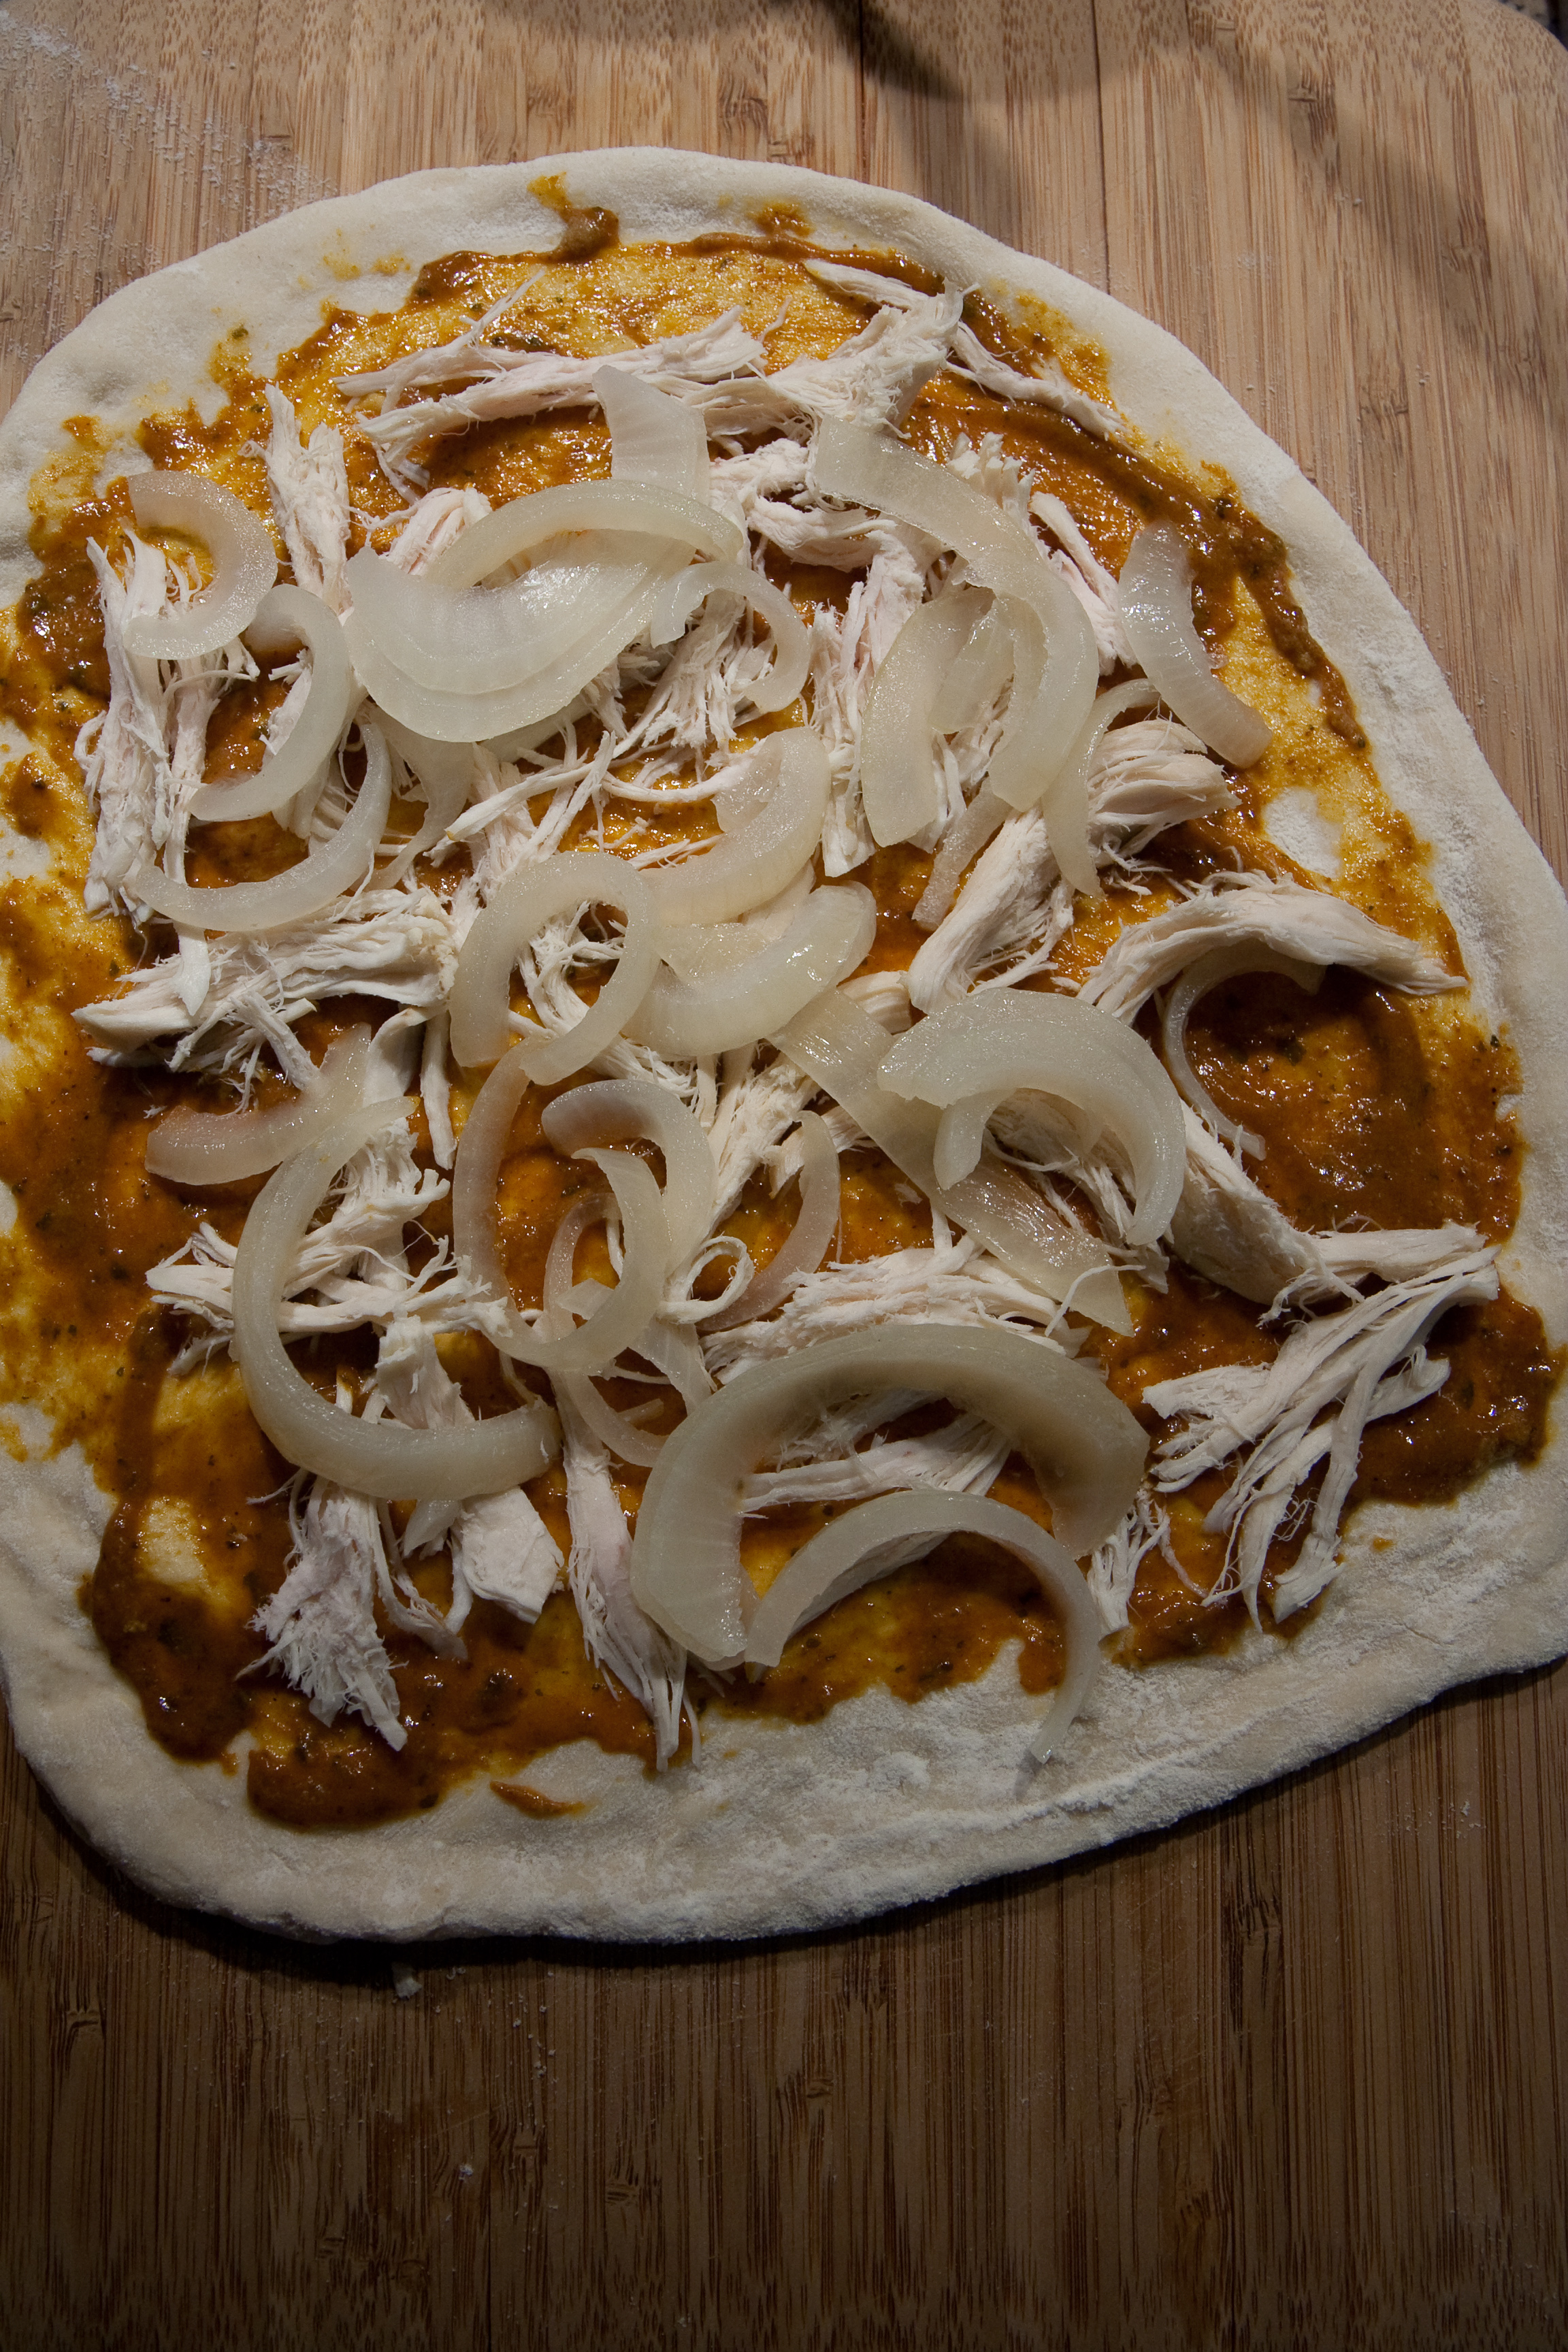
This amount of dough works really well for two restaurant-sized personal thin crust pizzas. If you want a thicker crust, then this will make one pizza I guess. Personally, I much more enjoy thin crust, so it works really well for my wife and I. So if you go this route, cut the dough in half and flatten out on some flour on the counter. Then pick it up and start stretching it out into a disc. What you're looking for is to maintain a ridge on the edge of the dough to make sure to keep the sauce on the pizza and not spilling over the edges of your pizza.

Keep stretching it out, and try and get it flat in the middle. This just takes some practice to get good at, but it isn't really possible to mess up. Just try to not put holes in your dough!

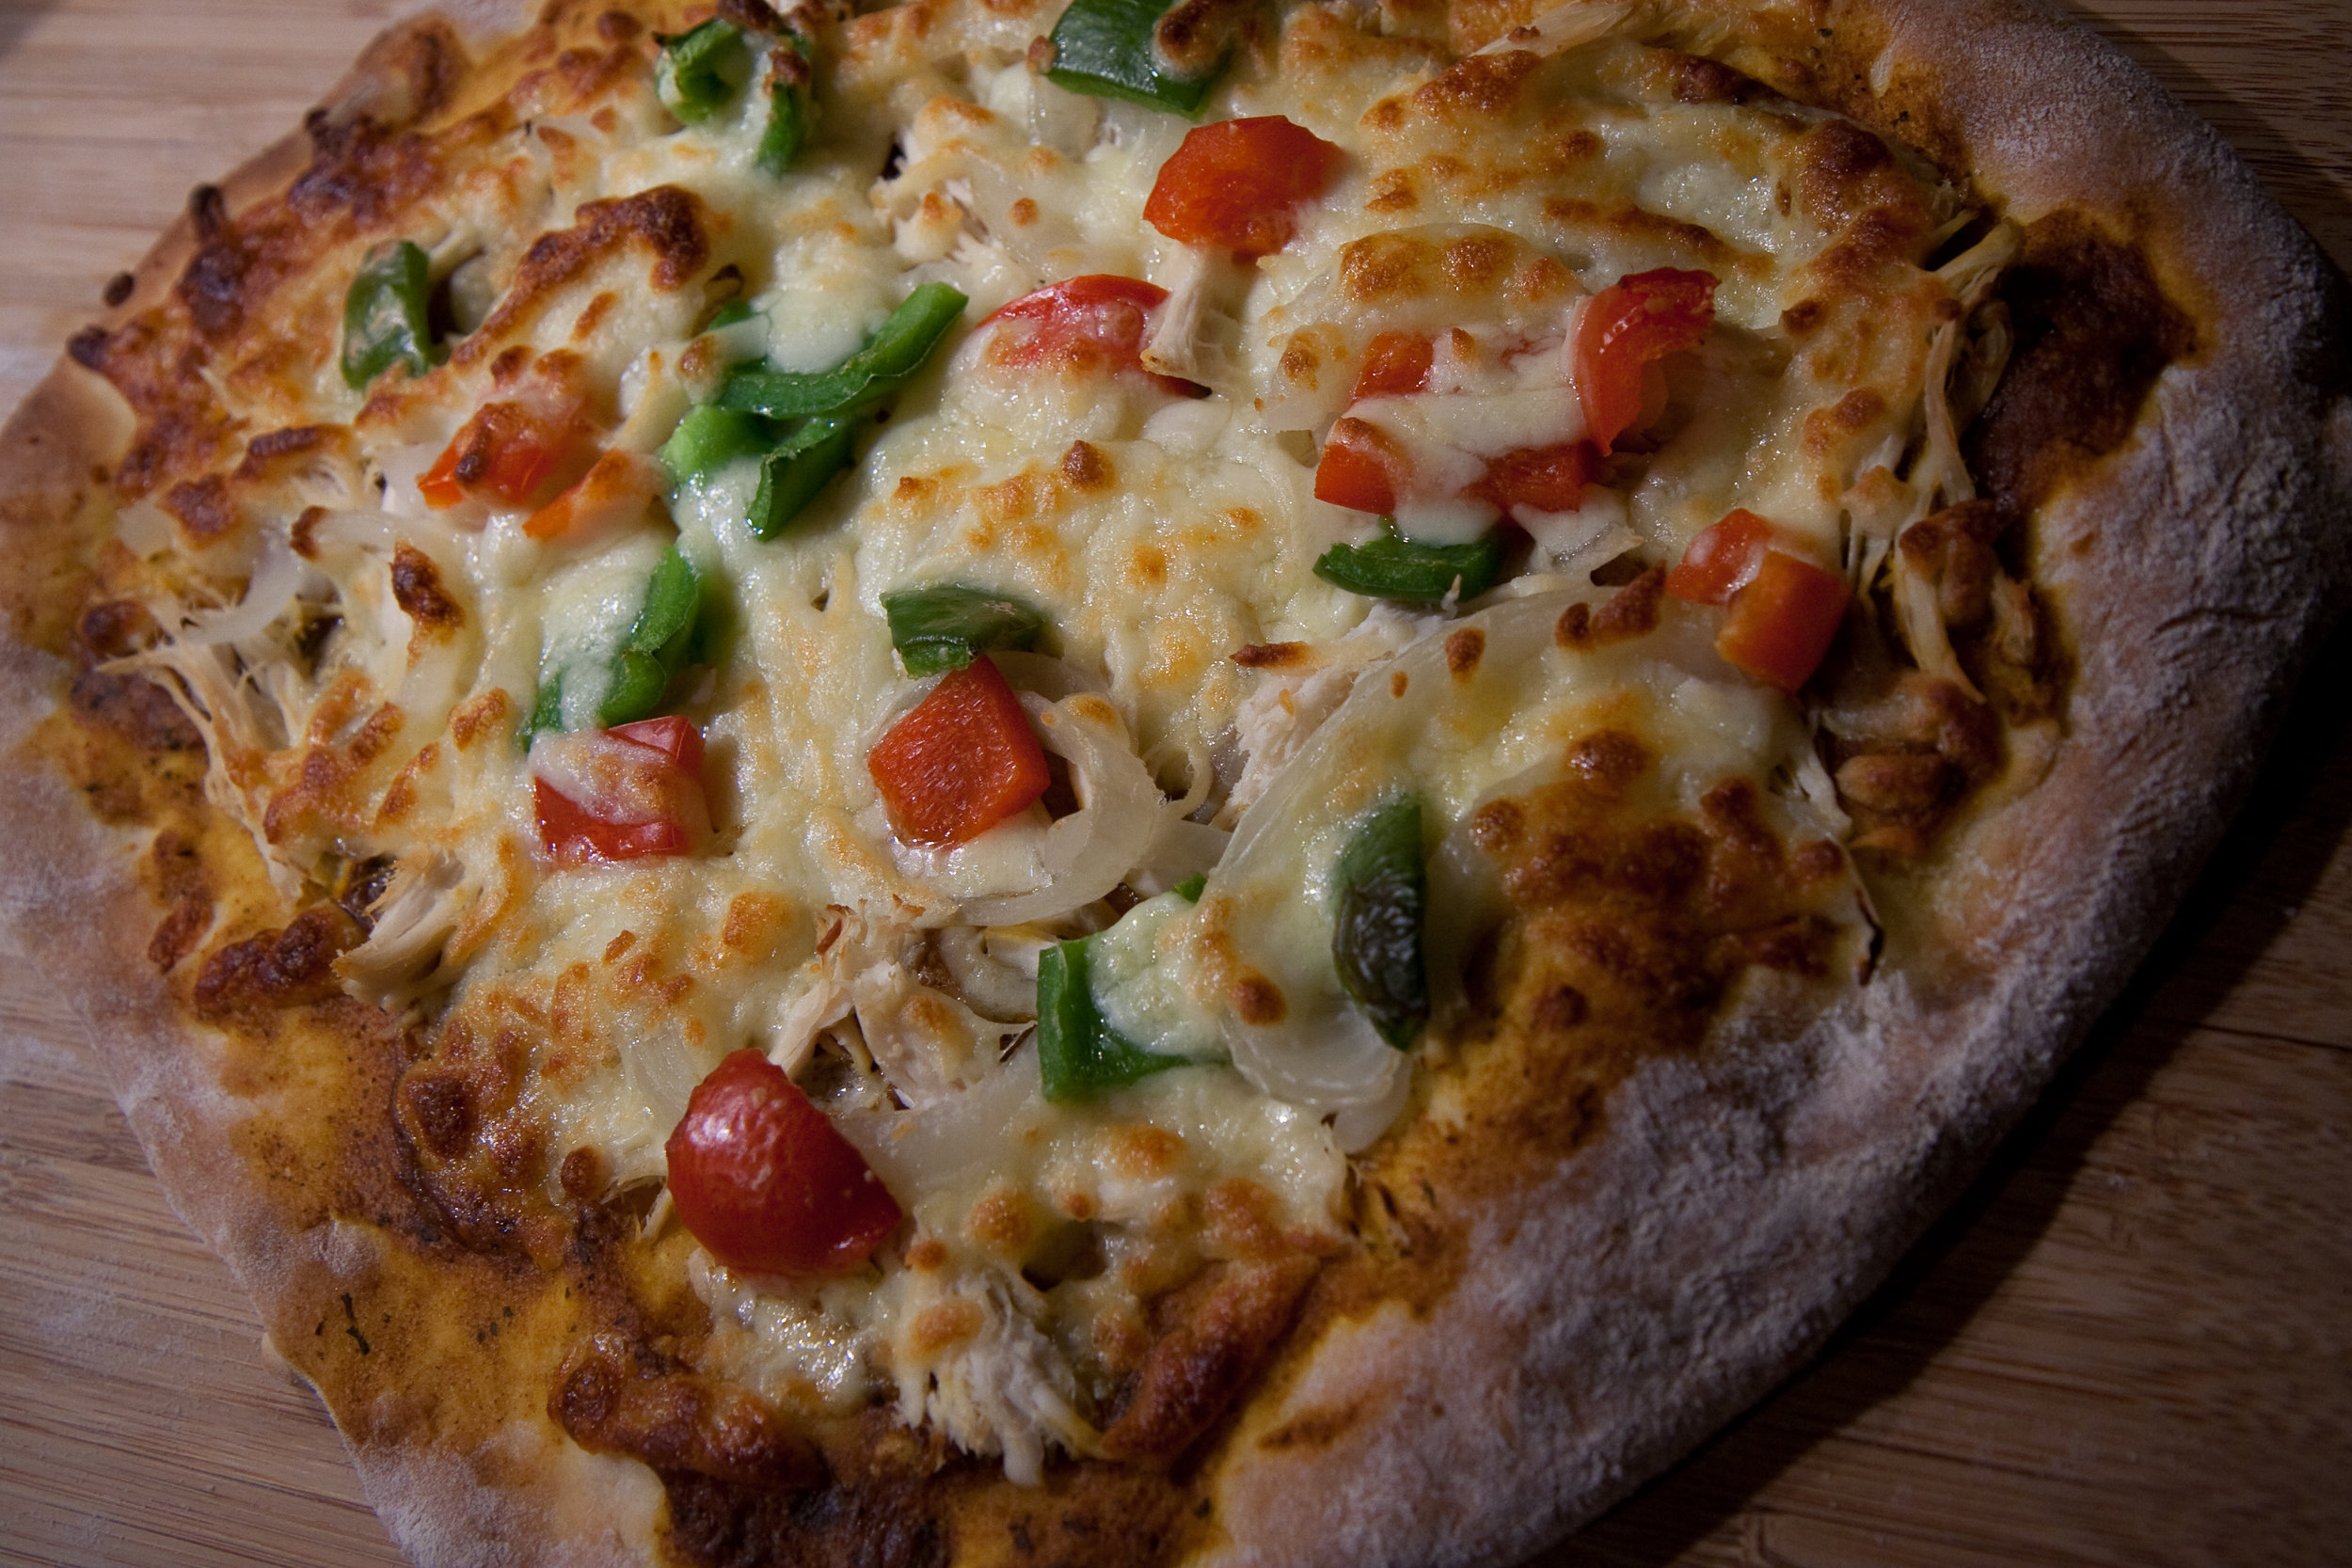
Now when it comes to toppings, be creative! Personally, I love BBQ sauce as a base, but you can be more traditional if you like. The real trick at this stage is to not go overboard on the toppings. If you load it up too much, your dough will be soggy in the middle and that's not cool. This particular time I went with tikka masala sauce, chicken, onions, peppers, and mozzarella cheese.
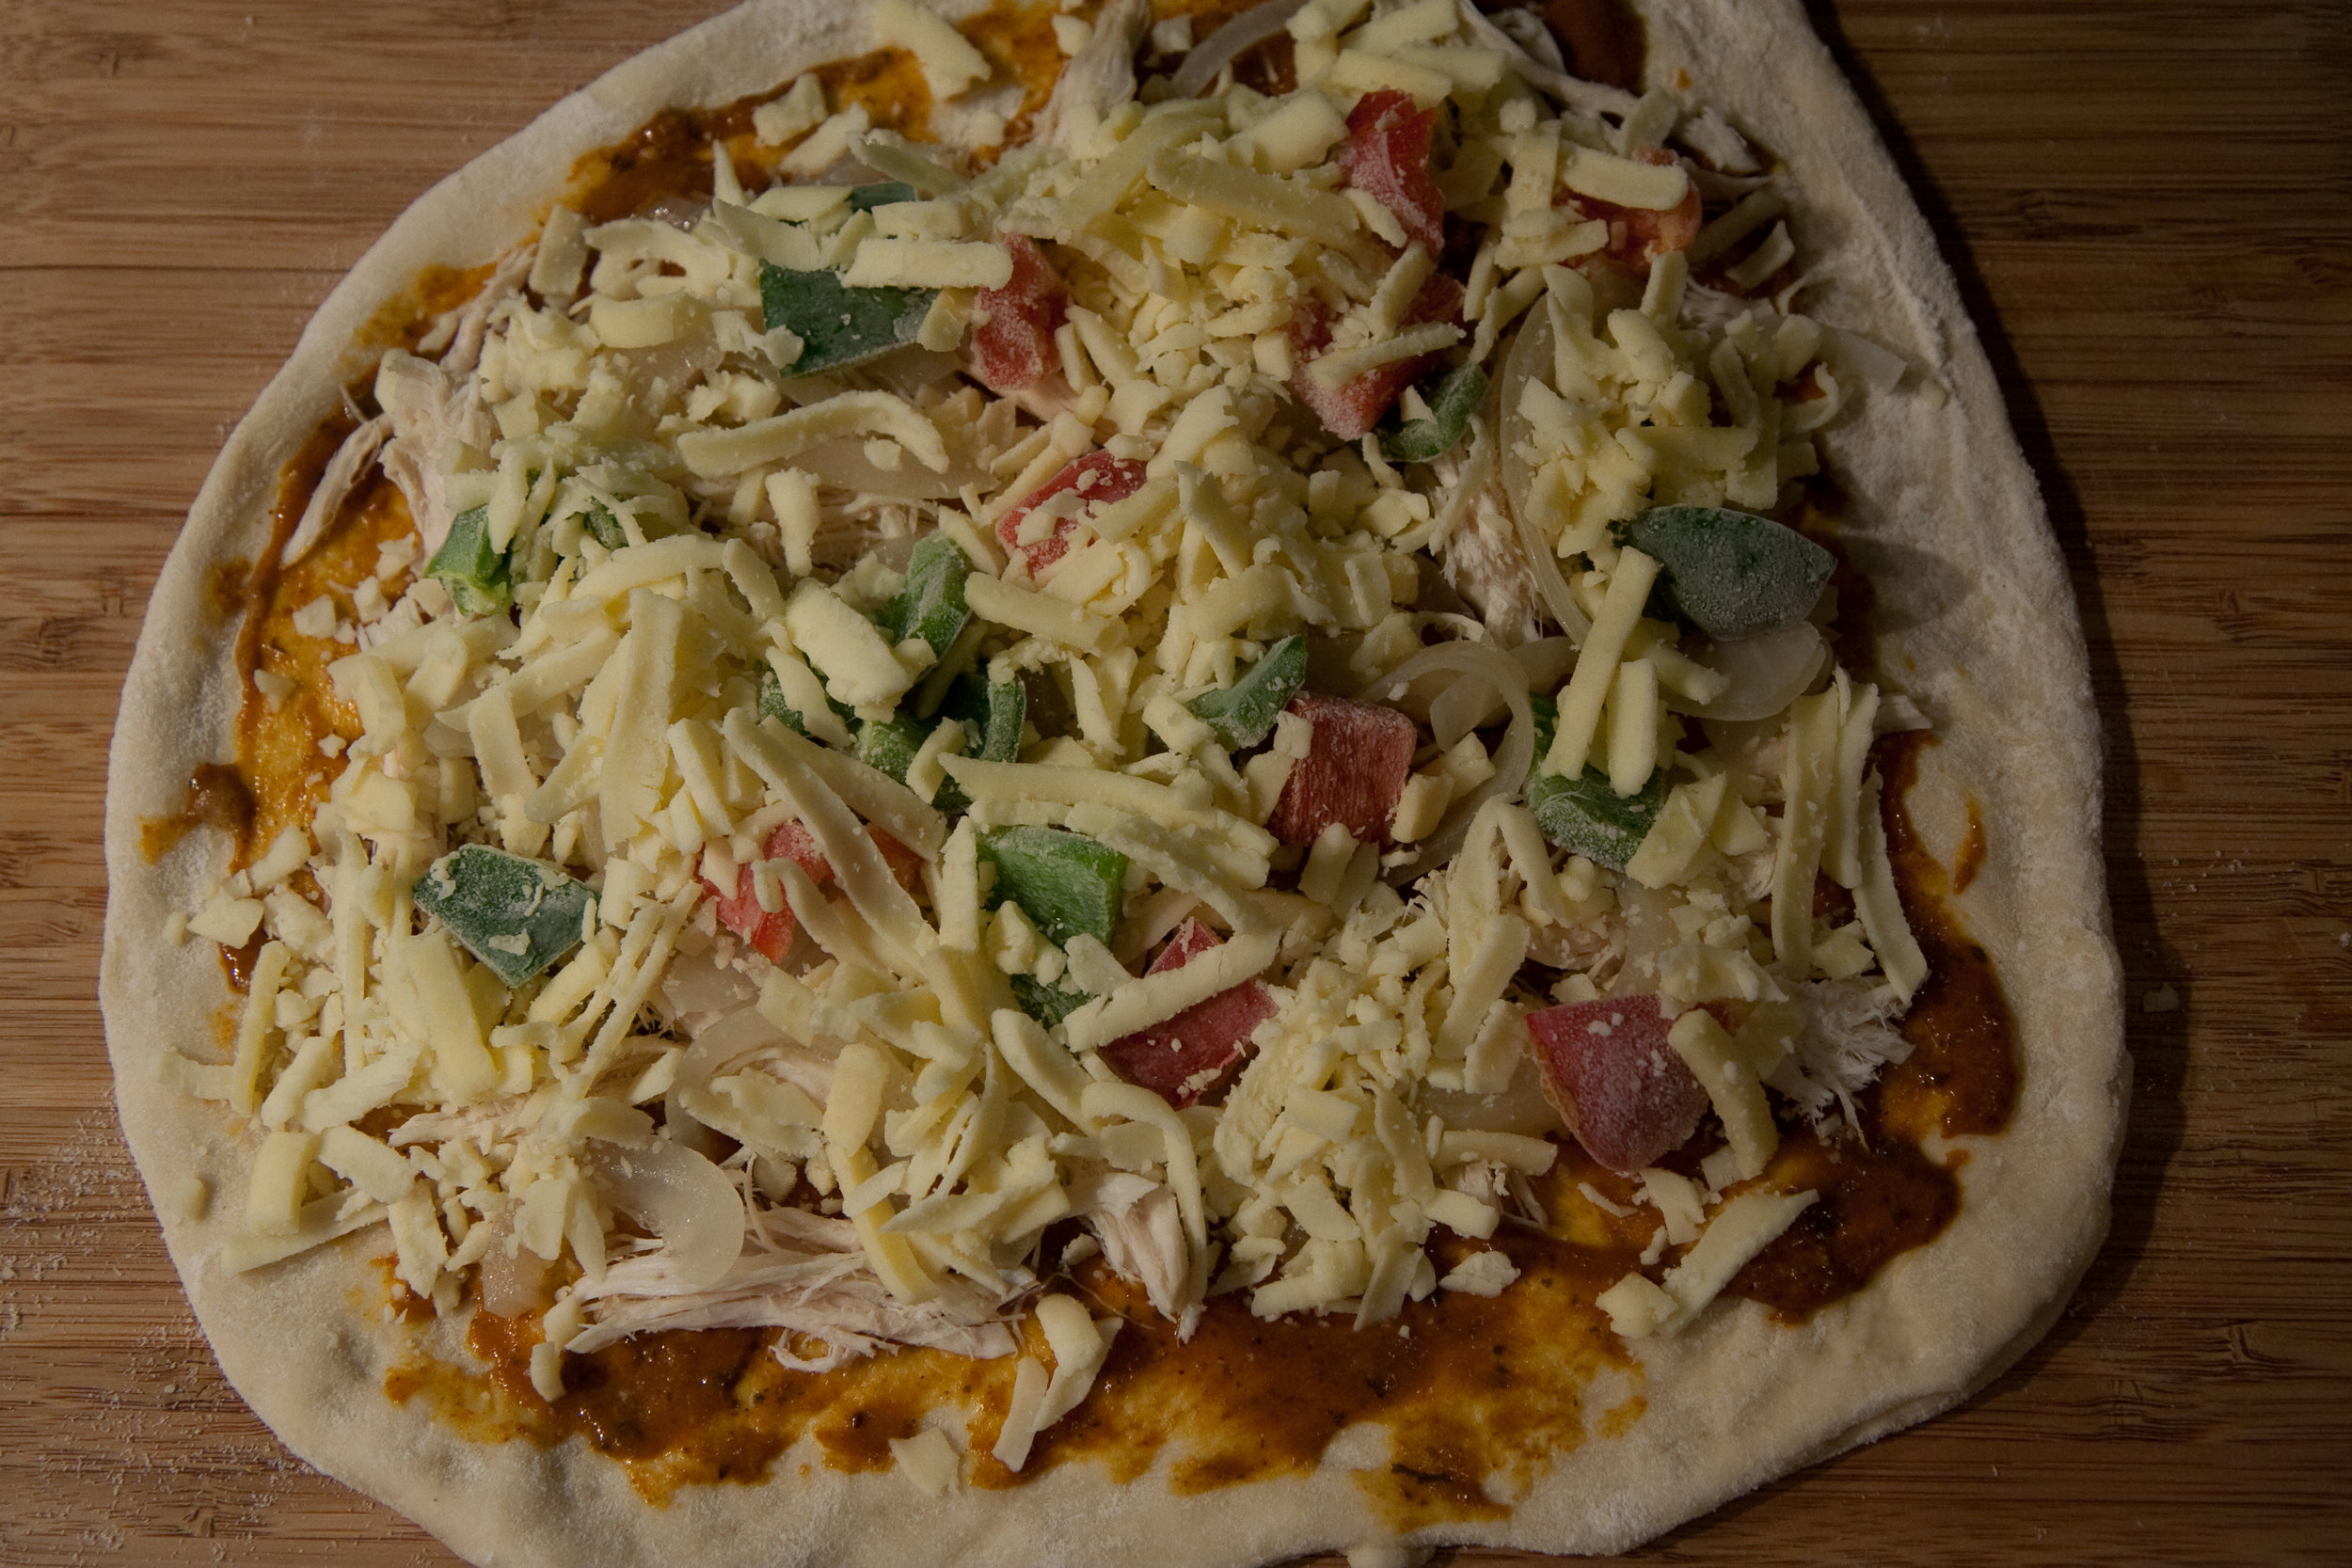
Pop the pizza into the oven. Ideally it should cook on a pizza stone, or at the very least on a pan that has holes in the bottom to let the heat more evenly cook the crust. But if not, you should do okay with a regular baking sheet. It just won't be quite as crispy.
Cook for 7-8 minutes or until your cheese starts to brown and the crust starts to get a bit darker. This looks about right:

Once you pull it out of the oven, let it sit for a minute or two. Your tongue will thank you for not burning it. Enjoy!